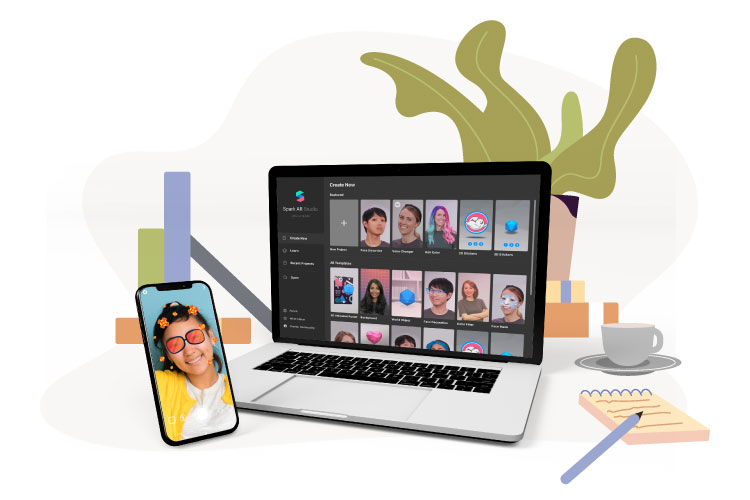
Facebook revealed at its F8 conference in May 2019 that everyone can use its Spark AR Studio platform to create custom AR filters. Users may create their unique AR effects for Instagram Stories, Facebook Stories, Messenger, and Portal on this new platform.
Instagram users had to be invited to use Spark AR before it became public in August 2019. As a result, only the selected Instagram users were able to create and share their customized AR filters. Anyone who wants to install Spark AR Studio now can experiment with Instagram filters AR.
Instagram users will have no trouble finding AR Instagram filters. The new face filters can be clicked by anyone who visits your brand’s Instagram page. Here you’ll find a collection of all the AR filter Instagram you’ve created.
How to use Instagram AR filters?
Effects that have been made public on Instagram can be found in the effect gallery. You can browse effects in the effect gallery and sort them by category and topic. Unless the effect represents a business, it will appear in the effect gallery under the associated category and may also show in the main tab. Here’s how you can find your Instagram effect gallery:
- 1. On the Instagram home screen, tap the Your Story or Camera icon. From the home screen, you may also swipe left.
- 2. At the bottom of the screen, you’ll see the effect tray, which is a carousel of effects. Scroll right to the bottom of the effect tray.
- 3. Select Browse Effects.
What is Spark AR Studio?
The process of designing an Instagram AR filter takes place on the Spark AR Studio platform. The majority of the work has already been done by the Spark AR team. When Facebook made Spark AR available to the public, it also introduced a creator community to assist its users in creating AR Instagram filters. On the Spark AR platform, some numerous official lessons and materials will greatly assist beginners.
How to create an Instagram AR filter with Spark AR Studio?
AR filters have taken over Instagram Stories. Do you want dog ears, rainbow-coloured eyes, and lashes that move in time with you? It’s no problem. Here is the step on how to make Instagram AR filters:
Step 1 – Download Spark AR Studio
Spark AR Studio is a desktop application with a download size of 464 MB. It’s a strong tool that you’ll find quite easy to use the more you work with it, despite its small size. It is now only available for Mac and Windows users.
Step 2 – Familiarize yourself with the platform
After you’ve installed the software, we recommend that you go through a few tutorials to familiarise yourself with the platform. A helpful introductory tour is included with Spark AR Studio. It lasts five minutes and will walk you through the majority of the platform’s features.
If you require additional assistance, visit the learning centre, where you can discover several tutorials. The Getting Started section contains basics that will help you rapidly become familiar with Spark AR Studio’s functionalities and navigation. There are additional tutorials on how to make a face-tracking effect, evaluate Spark AR Studio effects, use face reference assets, use templates, features and processes, effect lifecycle, policy, and more.
Step 3 – Add Object
Select the type of AR filter you want to make next. To get started, select a project and you’ll be sent to a canvas, commonly known as the Viewport, with your object placeholder already loaded. If this is your first time using Spark AR Studio, you must first approve their policy agreement before accessing your canvas.
The Viewport may appear to be a complicated canvas, but if you get stuck, refer to the tutorials page for help with each function. You’ll need to add an object to the Viewport. You can either import one or use the growing library of objects in Spark AR Studio. To import an item, we’ll use the AR Library. You can also add sound to your AR filters and import clips directly from the AR library.
A new window with several options will open. Once you’ve found your object, select 3D Objects from the menu and click the Import Free button. You’ll need to register a Sketchfab account or log in to their site using your Facebook, Google, or Twitter account because Facebook utilizes Sketchfab’s library of materials.
Step 4 – Add Effects
It’s time to add effects to your object now that it’s in the Viewport. These will have to do with how your object responds to user manipulation. Effects encompass how your object moves and appears when viewed from various angles in the actual world. We can begin changing the colour of our object after it is in place and here are several ways to do so:
- 1. Modify the directed light to add depth and realism to a 3D object.
- 2. Enable and disable the appearance of front, back, or both cameras.
- 3. Modify your object’s animation.
- 4. Increase the number of effects, such as animations, textures, and materials.
Step 5 – Test New Effect
You can send your test file to Instagram or Facebook to test your new AR filter. This will show you how your filter will look on each platform.
Step 6 – Publish Effect
You may upload your AR filter when you’re ready to publish your AR filter and Facebook will AR filters. You need to make sure your filter complies with Spark AR’s regulations because it may take a few days for the procedure to complete.
Feel free to contact us if you want to create the best AR filters Instagram for your business.

